1987 Shelby Charger GLH-S #0469
Traded for 92 Iroc R/T


|
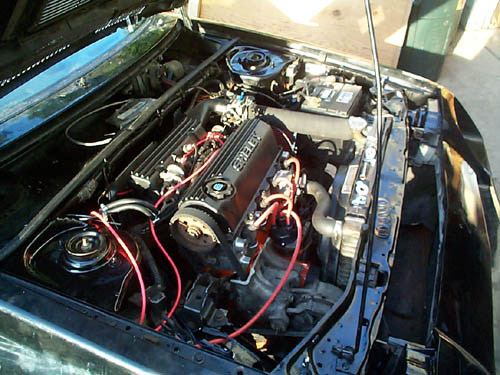
True TII Block, bored .020"
over |
TIII pressure plate with Centerforce
disc |
|
Forged crank and
rods |
A555 Tranny w/ Daytona shifter
assembly |
|
G-casting head w/ 89 TII roller cam
|
EGT, boost, oil pressure, o2 meter,
5" tach |
|
2.5" Turbo back mandral exhaust (JRB
Exhaust) |
MM Racing
adjustable zener diode |
|
MM Racing boost
controller |
+20% Mopar Performance
Injectors |
|
TIII pressure plate with Centerforce
disc |
Some tasteful lightening, and misc.
custom fabrication |
|
Shelby Stage II logic
module |
Bridgestone Potenza
RE730s |
This car was purchased in February, 2001 from a used car lot in Valparaiso, IN. While driving it home, the TII motor that was installed at some point, promptly let go causing catastrophic damage and a small engine bay fire. Taking this misfortune in stride, the motor was promptly pulled out and torn apart for a rebuild. MES in Monee, IL took care of re-boring the block, welding up the crank, and recutting the bearing surfaces as well. They were able to save only two of the con rods, and another two were purchased from Mopar to complete the engine. An A555 was acquired out of an '89 Daytona Shelby and the shifter and cables were donated from my '85 Daytona Turbo, which was scrapped recently. Here are some more pictures and info on what's been done:
As of 7-17-11:
I picked up the shell of GLHS #0469 today. It went through two owners, lost a lot of paint, and more parts. It's pretty much an empty rolling shell. No motor, no interior. It does have a roll bar welded in and aluminum interior door panels. But, the dash plaque and Centurion wheels were on it so it's worth the $250 I paid. Title was still in my name, which is scary... Alex never transfered it and Tommy didn't have it long enough to bother transfering it either. So 10 years later it's back in my hands and needs a lot of TLC. I'll be gathering parts for awhile, but hope to share progress.
As of 5-21-02:
This car was traded to Alex for the IROC R/T.
As of 7-10-01:
Almost 350 miles are on the GLHS now. Recent headaches include a hole in the radiator...a mysterious fusible link blowing...and massive compressor surge. All have been fixed and it made the 150 mile round trip to Belvidere without any problems. The A555 feels smooth as can be, and the motor is pulling some strong vacuum at idle. It has even been tested to 20 psi of boost at .89 volts on the o2 so far ;-) The test compound BF Goodrich drag radials showed up today. They feel just as soft as my slicks, and have a really cool tread pattern. We'll see if they help out traction at all over the Potenzas for street use.
As of 6-27-01:
The motor started, all gauges are wired in, and the exhaust will hopefully go on tonight along with a new axle seal in the trans to fix a slow leak. Then I can be on my way to putting some break-in miles on it. Pics to come soon.
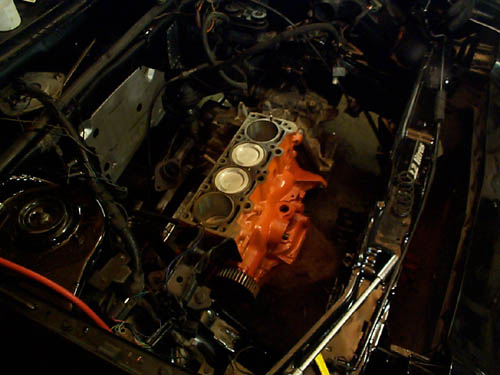
As of 6-6-01:
Yes, the motor is finally in! (Actually slightly more than 2.2 Litres, but we won't tell anyone = )
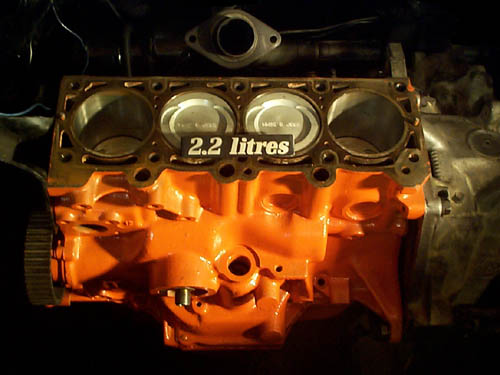
The orange actually doesn't look too bad in there, I can thank Alex for that one.
Back on 6-4-01:
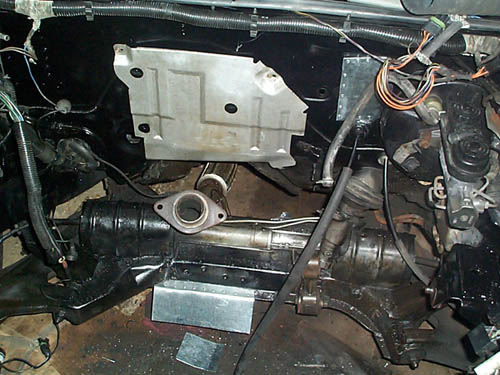
Here is a shot of the firewall. All wiring was pulled out of the engine bay and it was degreased and repainted with gloss black.

Here iHere is a close up of the new air deflector. It is riveted to the k-frame and in theory will draw air from under the car, over the turbo for some cooling, and then out the vent in the hood.
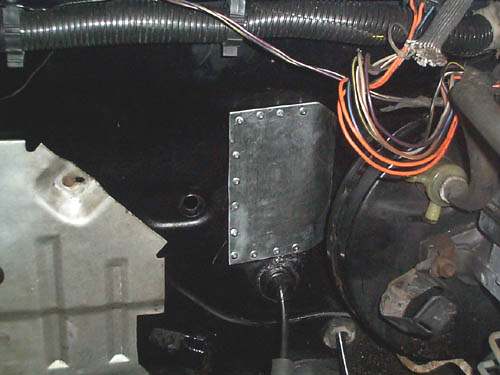
Here is a close up of one of the block off plates riveted to the firewall. These cover the holes left by the heater core, which was removed for weight and cleanliness issues. the surrounding lip was bludgeoned with a body hammer until it was flat, and then this plate was riveted over the hole.
The heater controls arn't very useful without the heater core, so the resulting opening was perfect for a custom switch panel.
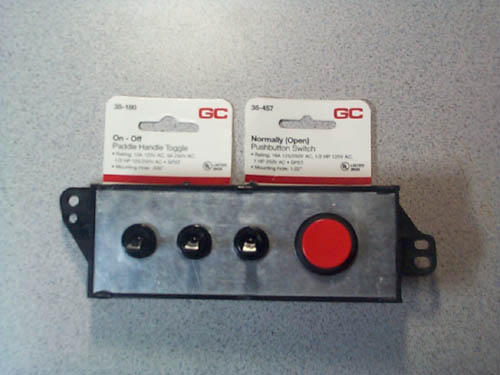
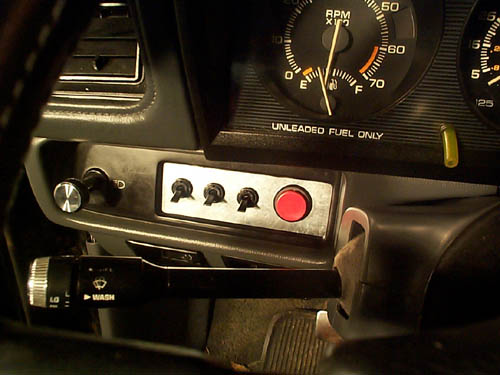
HHere is the panel out of the dash. The heater control bracket was used and a piece of sheet metal was cut to fit the opening. The part numbers on those switches is 35-180 and 35-457. These will control Ignition, starter, manual fan relay, and NOS arming relay. By the way, the easiest way I found to cut the 1" hole for the starter button was to trace the cirlcle and use a jewelers saw to cut the opening. The switches just mount in 0.500" holes which are easier to drill out.